- bernardsmith.net/
- Posts/
- VCF 9 Management Domain with NFS Principal Storage: Deploying with Vmknic Binding on the First Host/
VCF 9 Management Domain with NFS Principal Storage: Deploying with Vmknic Binding on the First Host
One of the things that makes VCF 9 great for home labs is being able to deploy your management domain using NFS as principal storage. This has two key advantages: You only need two ESX hosts and you can offload the storage processing to a relatively cheap NAS. I know you could technically do this in VCF 5.2, but that required you to manually deploy all the appliances and then import it into SDDC Manager. It’s much nicer to deploy it using the VCF Installer workflow.
When inputting your NFS share information into VCF Installer, you have the option to select “NFS Datastore with datastore bound to vmknic”. This is recommended as a best practice to ensure NFS traffic always traverses your NFS-specific vmknic. As stated in VMware documentation, not binding NFS to a vmknic may result in NFS traffic flowing through an unexpected adapter and an unexpected network, like your VM management network.
There is a slight issue with this workflow though. Before VCF Installer allows you to start the deployment, it checks if an NFS datastore exists on the first ESX host with the same settings you provided in the workflow. This means you need to manually configure NFS on your ESX host before VCF Installer can take over.
If you just create an NFS datastore in the ESX host client, you’ll have an issue after the deployment completes. All of your ESX hosts will have a vmknic bound to the NFS datastore, except for your first host. Apparently, VCF Installer does not (or simply cannot) fix this during the deployment.
However, it’s possible to setup NFS with a bound vmknic on your first ESX host, so you can avoid the headache of reconfiguring your NFS datastore after deployment. It just takes a single esxcli command.
First, navigate to your first host’s web UI and create a portgroup on the default vSwitch for your NFS VLAN. Then create a vmknic on that portgroup. No need to specify any services. Now, enable SSH and connect to your ESX host’s shell.
In order to add the NFS datastore with a bound vmknic, use the esxcli storage nfs add command with the --host-vmknic argument. This allows you to specify the NFS server’s address and a vmknic to bind the datastore to. After that, provide the same --volume-name and --share that you used in VCF Installer.
esxcli storage nfs add --host-vmknic=10.0.0.2:vmk1 --volume-name=mgmt-cl01-ds-nfs01 --share=/mnt/storage/nfs/
After you enter that command, you can verify the vmknic binding with the esxcli storage nfs list command. Confirm that your desired vmknic is listed in the Vmknic column, which is likely going to be vmk1.
[root@esx-01:~] esxcli storage nfs list
Volume Name         Host      Share              Vmknic  Accessible  Mounted  Connections  Read-Only   isPE  Hardware Acceleration
------------------  --------  -----------------  ------  ----------  -------  -----------  ---------  -----  ---------------------
mgmt-cl01-ds-nfs01  10.0.0.2  /mnt/storage/nfs/  vmk1          true     true            1      false  false  Not Supported
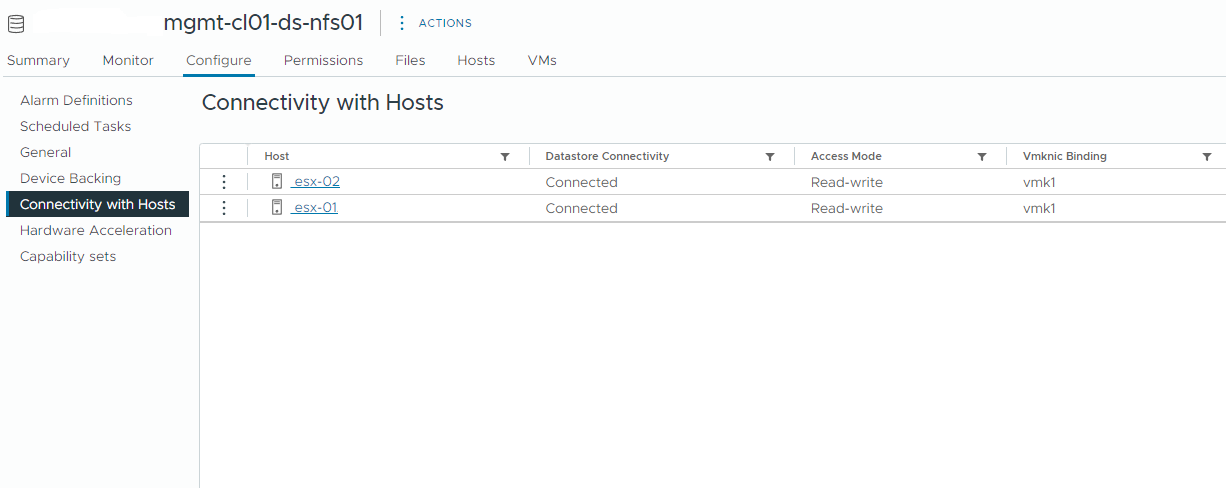
Now, let VCF Installer deploy VCF 9. Afterwards, you can verify in vSphere Client that all of your hosts have the NFS datastore mounted with a bound vmknic!
