- bernardsmith.net/
- Posts/
- vCenter - Configuring OCSP Revocation Checking with a Self-Signed Responder Certificate/
vCenter - Configuring OCSP Revocation Checking with a Self-Signed Responder Certificate
Table of Contents
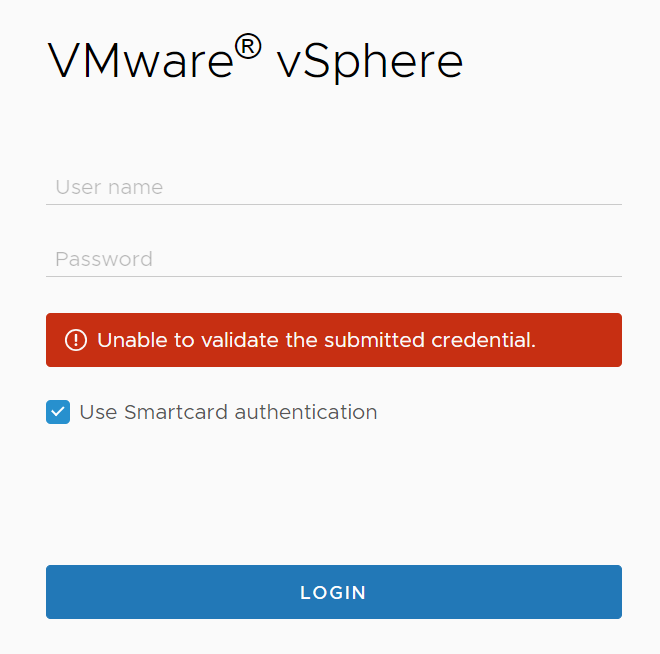
I recently needed to configure OCSP certificate revocation checking in vCenter for a customer. They also had a local OCSP responder, so I configured revocation checking to use that responder instead of the one from the certificate. Despite appearing to have set it up correctly, all smart card login attempts failed with this message.
Looking through the logs, I found these error messages in the sso-websso log.
Caused by: java.security.cert.CertPathValidatorException: Responder's certificate is not authorized to sign OCSP responses
com.vmware.identity.idm.CertRevocationStatusUnknownException: Unable to validate certificate path. Message: [Responder's certificate is not authorized to sign OCSP responses] Reason: [UNSPECIFIED]
At first glance, it seems like the issue is that the responder certificate wasn’t configured properly and might be missing the proper key usage extension. However in this customer’s case, the certificate was correct and had the right OCSP Signing key usage extension. The issue was actually that vCenter did not trust the responder’s certificate. vSphere documentation says this:
If your OCSP response is issued by a different CA than the signing CA of the smart card, provide the OCSP signing CA certificate.
It’s a self-signed responder certificate, so I initially figured adding it to vCenter’s trusted CA store might resolve the issue. But the certificate did not have the CA usage extension, so vCenter rejected it.
Turns out, the answer is in another page of the vSphere documentation. Admittedly, a little buried in there. There isn’t a way to manually specify the OCSP responder’s certificate from the vSphere UI. But you can still do so through the CLI using the sso-config.sh command.
Configuring an OCSP Responder with a Specific Responder and Signing Certficiate #
First, enable OCSP revocation checking, either through the vSphere UI or with sso-config.sh, which is demonstrated below. The -t flag is the your vSphere SSO domain name, which is commonly vsphere.local.
sso-config.sh -set_authn_policy -t vsphere.local -useOcsp true
Now you add the responder as an alternative OCSP responder, which allows you to manually specify the responder’s signing certificate. You provide three inputs to the command: t for tenant, ocspUrl for the OCSP responder server’s URL, and then ocspSigningCert for the responder’s signing certificate. You’ll need to upload the OCSP responder’s certificate to vCenter Server and then run the command. And if you have multiple vCenter Servers in enhanced linked mode (ELM), this will actually replicate to the other servers. So no need to repeat this action on each one.
sso-config.sh -t vsphere.local -add_alt_ocsp -ocspUrl http://ocsp.sddc.lab -ocspSigningCert ocsp-signing-cert.cer
To validate that the configuration was successfully applied, you can use the following sso-config.sh command.
sso-config.sh -t vsphere.local -get_alt_ocsp
And finally, to remove the OCSP responder from your config, use the following command. Be warned that it’ll remove all of the OCSP responders from your SSO config. So if you configured backup OCSP responders, you’ll need to add them back in after running this command.
sso-config.sh -t vsphere.local -delete_alt_ocsp
Downloading an OCSP Responder’s Certificate #
In order to configure vCenter to use OCSP with a specific certificate, you obviously need the certificate on-hand first. If you don’t feel like waiting for your PKI team to send it, you can also retrieve it yourself using openssl.
To do so, you essentially perform an OCSP request with the desired OCSP responder server. Since the OCSP responder signs all of its responses, you will be able to see the signing certificate in the response. You can do this in openssl (which is available on vCenter) with the following command:
openssl ocsp -issuer issuer_cert.cer -cert cert_to_check.cer -url http://ocsp.sddc.lab -resp_text
You’re only looking for any OCSP response; not necessarily a valid one. So the issuer certificate and checked certificate don’t actually need to be real. You could provide the same, self-signed certificate in both fields and still get the desired result.
openssl ocsp -issuer DODIDCA_62.cer -cert dummy.cer -url http://ocsp.sddc.lab -resp_text
At the way bottom of the response, you’ll see the OCSP responder’s signing certificate in base-64 format. This example response comes from the DISA OCSP server at http://ocsp.disa.mil.
$ openssl ocsp -issuer DODIDCA_62.cer -cert DODIDCA_62.cer -url http://ocsp.disa.mil -resp_text
OCSP Response Data:
    OCSP Response Status: successful (0x0)
    Response Type: Basic OCSP Response
    Version: 1 (0x0)
    Responder Id: C = US, O = U.S. Government, OU = DoD, OU = PKI, CN = DOD NIPRNET OCSP 11T 3

[...snip...]

        09:61:07:fc:0c:0e:e0:09:bc:94:ee:ca:9d:bc:e1:87:2b:a3:
        72:24:ed:54
-----BEGIN CERTIFICATE-----
MIIDgDCCAmigAwIBAgIUEw1EQAmyJRBV7i+uzNSl7v1kZkgwDQYJKoZIhvcNAQEL
BQAwZDELMAkGA1UEBhMCVVMxGDAWBgNVBAoTD1UuUy4gR292ZXJubWVudDEMMAoG
A1UECxMDRG9EMQwwCgYDVQQLEwNQS0kxHzAdBgNVBAMTFkRPRCBOSVBSTkVUIE9D
U1AgMTFUIDMwHhcNMjMwNjAyMTUwMzM5WhcNMjYwNjAxMTUwMzM5WjBkMQswCQYD
VQQGEwJVUzEYMBYGA1UEChMPVS5TLiBHb3Zlcm5tZW50MQwwCgYDVQQLEwNEb0Qx
DDAKBgNVBAsTA1BLSTEfMB0GA1UEAxMWRE9EIE5JUFJORVQgT0NTUCAxMVQgMzCC
ASIwDQYJKoZIhvcNAQEBBQADggEPADCCAQoCggEBAMGm9WTbyJId0MndGQcwj/p2
rI0jaL9SwXXGcQLm/6tTQ2OmGmi1ekFvfYn1YT1iFrOkDBKauVoOgUE5K0p9V5zk
gYvHKrxG8QNCE0XugeJIlkSa8WKIaF03pqIgDxLCyfx+KzJUMm0g44sLa0GiKz4L
wfY/rFj8dtdL1PbMhyctG+QmUxjFLP49z6AgVE3PvRypIErVRzVEsK1zvtiQpRRx
/JGMIwyv3MYUCWEdHqhNBx4zPGYKBPNEKk0PWfiWpLUf8scAfHpkK3m683iGvC23
gPOj1ekm8TyxAA85s8qISpFUTWIFJQ162SFFHAxUsoVAse7WQ++uzHEO9CaQBtcC
AwEAAaMqMCgwDgYDVR0PAQH/BAQDAgeAMBYGA1UdJQEB/wQMMAoGCCsGAQUFBwMJ
MA0GCSqGSIb3DQEBCwUAA4IBAQA0u4saiIBkWMJYf6e/NFKsDL7HSBdE6nPN27RJ
YAN8BYkcbUfqv6S/cwqZET6blnmHAoDdXpDmljt1tPoSjiLixSYij/Yljslcl5ct
NSfQR6eopUBtuoxh7S7KVxsniae6otYmxUTJ35p+WHYVFAoVCDcVvkag0NnaQPIQ
5hm5YVigaXC0PhnR/2BRjdVALrvcq27eBJXmbuarbX/vOR4hpO4l+DwhpRr4JdUm
V3fmCQDS0gpbapwFtLynI+XY8IzCO7W5VPTXZ1wIdaB5hbMLbPoQmQ4wSm3NH/fW
0CJXaG7nDIDozCCtoTMJYQf8DA7gCbyU7sqdvOGHK6NyJO1U
-----END CERTIFICATE-----
Response Verify Failure
28310000:error:13800065:OCSP routines:ocsp_verify_signer:certificate verify error:..\crypto\ocsp\ocsp_vfy.c:64:Verify error: self-signed certificate
28310000:error:13800065:OCSP routines:ocsp_verify_signer:certificate verify error:..\crypto\ocsp\ocsp_vfy.c:64:Verify error: self-signed certificate
DODIDCA_62.cer: good
        This Update: Aug 16 08:00:00 2025 GMT
        Next Update: Aug 23 17:00:00 2025 GMT
Now all you need to do is copy and paste that certificate into a .cer file and upload it to vCenter!